Introduction and Quick Summary
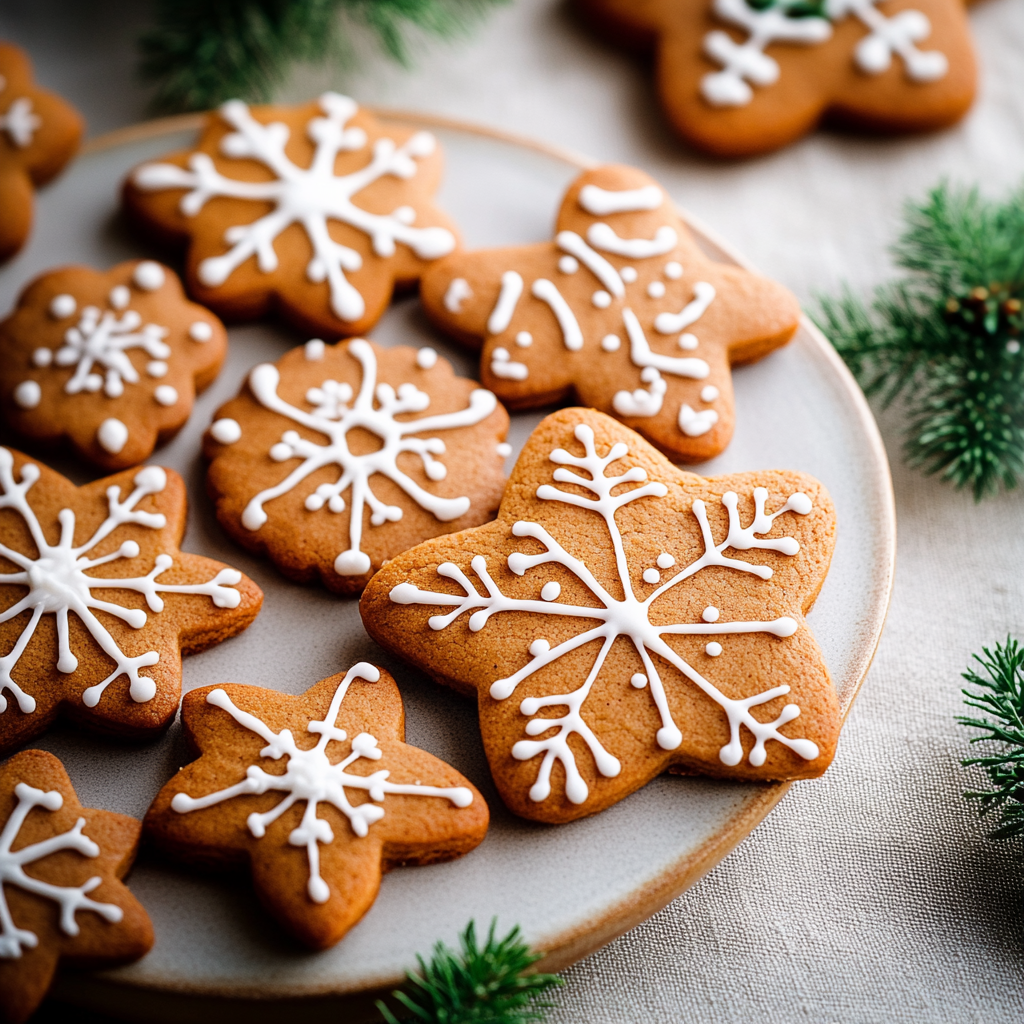
Gingerbread Cookies with Royal Icing are a timeless holiday treat that brings warmth and joy to any celebration. With their rich spices and delightful sweetness, these cookies evoke memories of cozy winter evenings spent with family and friends. The combination of soft, flavorful gingerbread and the crisp, glossy finish of royal icing makes them not only taste delicious but also visually appealing. Whether you are looking to create festive decorations or simply enjoy a tasty snack, this recipe is perfect for you.
In this article, we will guide you through the process of making these delightful cookies from scratch. You will learn about the essential ingredients that contribute to their unique flavor and texture. Additionally, we will provide step-by-step instructions on how to prepare your gingerbread cookies and decorate them with beautiful royal icing. By the end of this post, you’ll be equipped to create a batch of impressive gingerbread cookies that will undoubtedly become a cherished part of your holiday traditions.
So roll up your sleeves and get ready to bake! With a little patience and creativity, you’ll soon have a plate full of beautifully decorated Gingerbread Cookies with Royal Icing that everyone will adore.
Main Ingredients
All-purpose Flour
All-purpose flour is the foundation for our Gingerbread Cookies with Royal Icing. It provides the structure needed to hold the cookies together while allowing them to maintain a soft texture. For this recipe, you will need 3 ¾ cups (450 grams) of all-purpose flour. Ensure you spoon it into the measuring cup and level it off for accurate measurement.
Ground Ginger
Ground ginger is the star spice in these cookies. Its warm and spicy flavor enhances the overall taste profile of the gingerbread. For an authentic experience, use 1 tablespoon (15 grams) of ground ginger in your dough. This ingredient adds warmth and depth while also offering health benefits like aiding digestion.
Ground Cinnamon
Cinnamon brings an aromatic sweetness to our gingerbread cookies. It complements the spiciness of ginger beautifully while providing its unique warm flavor profile. In this recipe, add 1 teaspoon (2 grams) of ground cinnamon for optimal flavor balance.
Baking Soda
Baking soda acts as a leavening agent in this recipe, helping the dough rise slightly during baking. This ensures that your gingerbread cookies have a light texture rather than being dense or flat. Use 1 teaspoon (5 grams) of baking soda in your mixture.
Brown Sugar
Brown sugar contributes moisture and a rich caramel flavor to our gingerbread cookies. It enhances both sweetness and color. You will need ¾ cup (150 grams) of packed brown sugar for this recipe; make sure it’s firmly packed into your measuring cup for accurate results.
Molasses
Molasses adds depth and richness to our cookie dough while giving it a distinct dark color typical in traditional recipes. Use ½ cup (120 milliliters) of unsulfured molasses for optimal results in flavor and consistency.
Butter
Butter is essential in creating tender cookies with great flavor. Use unsalted butter at room temperature for easy mixing—it should be about ½ cup (115 grams). Make sure it’s softened but not melted to achieve perfect cookie dough consistency.
Eggs
Eggs help bind all ingredients together while adding moisture to our cookie dough. For this recipe, include 1 large egg at room temperature which contributes richness as well as aids in leavening when baked.
Powdered Sugar
Powdered sugar is necessary for making royal icing which serves as both decoration and glue for additional embellishments on your cookies! Use about 3 cups (360 grams) powdered sugar combined with egg whites or meringue powder to create smooth icing.

How to Prepare Gingerbread Cookies with Royal Icing
Preparing the Dough
Start by combining all dry ingredients—flour, ground ginger, ground cinnamon, baking soda—in a medium bowl; whisk until fully blended. In another large bowl, cream together softened butter and brown sugar until light and fluffy using an electric mixer on medium speed; this should take approximately 2-3 minutes.
Once well combined, add molasses followed by one large egg; mix until incorporated smoothly into creamy batter—scrape down sides as needed! Gradually add flour mixture into wet ingredients; mix on low speed until just combined—you don’t want overmixing here! Once combined successfully shape dough into disks; wrap tightly in plastic wrap & refrigerate at least two hours—or preferably overnight—to allow flavors meld harmoniously!
Rolling Out Dough
After chilling time has elapsed & you’re ready to bake preheat oven at 350°F (175°C). Lightly flour work surface then remove one disk from refrigerator; let sit briefly before rolling out between two sheets parchment paper until thickness reaches about ¼ inch thick—this prevents sticking while cutting shapes!
Use cookie cutters shaped like festive figures or traditional designs such as stars & bells! Transfer cutouts carefully onto prepared baking sheet lined parchment paper ensuring they aren’t touching each other closely—you’ll need space during baking! Repeat process until all dough used up—if desired gather scraps back together gently knead & re-roll out again!
Bake each batch around 8-10 minutes or until edges start turning golden brown but centers remain soft—cookies continue firming up once removed from heat! Allow cooling completely on wire racks before decorating them further!
Making Royal Icing
While waiting on cooled cookies whip together powdered sugar along egg whites/mix meringue powder according package instructions—aiming obtain smooth consistency resembling toothpaste upon completion! Feel free adjust thickness by adding small amounts water/extra powdered sugar gradually if needed—be cautious not make too runny!
To decorate use piping bags fitted various sizes tips based desired designs—small tip ideal intricate lines whereas larger one suited filling spaces more broadly! Optionally tint sections using gel food coloring achieving vibrant hues tailored festive themes! Allow icing dry fully after application taking several hours or overnight depending humidity levels—this ensures stability & allows creativity flourish without worry smudging easily!

Serving and Storing Tips
Serving Suggestions
Gingerbread Cookies make wonderful treats served warm alongside hot cocoa or spiced tea during chilly weather gatherings—a perfect way bring families/friends together sharing laughter stories around table! Consider arranging decorated versions on platters garnished sprigs fresh mint/candy canes creating visually striking centerpiece drawing guests’ attention immediately!
These delightful treats also pair beautifully when packaged into gift boxes adorned ribbons/bows making thoughtful presents loved ones during holidays! If hosting special occasions consider serving alongside assorted desserts providing variety satisfying every palate present—from fruit tarts brownies cupcakes showcasing festive flair enticing even those less inclined indulge sugary delights!
Storing Your Cookies
For optimal freshness store un-decorated baked Gingerbread Cookies in airtight containers at room temperature lasting up week—or longer when refrigerated! Just ensure proper sealing preventing drying out compromising textures/flavors achieved initially upon baking processes completed satisfactorily!
Decorated versions require slightly different approach since they’ll stay fresher longer stored within cool dark places avoiding direct sunlight exposure which may cause colors fade away over time—ideally consume within two weeks though some prefer savoring lovely aesthetics over prolonged periods cherishing every bite indulged more slowly than usual routine allows normally!
Feel free freeze undecorated shaped dough if planning ahead saving time later preparing batches multiple times throughout season! Simply wrap tightly plastic wrap placing freezer-safe bags keeping organized labeling dates/who knows maybe surprise friends next year gifting homemade goodies once again? Enjoy creating memorable moments indulging irresistible flavors brought forth deliciously crafted recipes shared lovingly among dear ones gathered ’round kitchen filled scents happiness radiating joyfully everywhere imaginable!
Mistakes to Avoid
When baking Gingerbread Cookies with Royal Icing, it’s easy to make mistakes that can ruin your experience. Here are some common pitfalls to avoid:
One major mistake is not measuring the ingredients correctly. Baking is a science, and even small discrepancies can lead to undesirable results. Use a kitchen scale or measuring cups specifically designed for dry or liquid ingredients. Remember that ingredients like flour can compact, leading you to use more than necessary if you scoop it directly from the bag. Always spoon flour into your measuring cup and level it off for accuracy.
Another frequent error is skipping the chilling process for the dough. Chilling the dough helps solidify the fat, making it easier to roll out and cut shapes without losing their form. If you skip this step, your cookies might spread too much during baking, resulting in irregular shapes. Ideally, chill the dough for at least an hour before rolling it out.
Moreover, many bakers underestimate the importance of oven temperature. An oven that is too hot can cause cookies to brown quickly on the outside while remaining raw inside. Invest in an oven thermometer to ensure your oven maintains the correct temperature throughout the baking process. Preheating your oven is crucial; never place cookies in a cold oven.
Lastly, be cautious with decorating techniques when applying royal icing. A common mistake is using icing that’s either too thin or too thick, which affects its ability to adhere and create beautiful designs. Practice mixing your royal icing until you achieve a smooth consistency that holds its shape but still flows easily when piped.
Tips and Tricks
To master Gingerbread Cookies with Royal Icing, consider these essential tips and tricks:
Start with high-quality ingredients. The flavor of your gingerbread cookies largely depends on the spices and extracts used. Opt for fresh ground ginger, cinnamon, and nutmeg for richer flavors. Similarly, choose pure vanilla extract over imitation for better taste in both cookies and icing.
Incorporate a variety of spices into your gingerbread recipe to enhance complexity and depth of flavor. Besides ginger and cinnamon, consider adding cloves or allspice for additional warmth. You can adjust these spices based on personal preference; however, don’t stray too far from traditional proportions as it may alter the overall character of your cookies.
For rolling out your dough without sticking, dust your work surface with flour or use parchment paper beneath it. If you find that the dough gets too soft while rolling out at room temperature, return it to the fridge for a few minutes before continuing. This will save you from frustration and ensure clean-cut shapes.
When decorating with royal icing, practice piping techniques beforehand on parchment paper or wax paper if you’re new to it. This will help you get comfortable with pressure control when creating outlines or filling in designs on your cookies.
Lastly, let decorated cookies dry completely before stacking them or placing them in containers. Aim for at least 24 hours of drying time; this prevents smudging and ensures that your royal icing sets properly so that they maintain their beautiful appearance.
Suggestions for Gingerbread Cookies with Royal Icing
Enhance your experience making Gingerbread Cookies with Royal Icing by following these suggestions:
Consider using themed cookie cutters for festive occasions like Christmas or Halloween. This adds fun elements that appeal to both children and adults alike while also simplifying decorating tasks since shaped cutters often inspire designs.
Experiment with natural food coloring in your royal icing if you’re looking for vibrant colors without artificial additives. Beet juice can create lovely reds while spirulina powder yields bright greens—both options are healthier alternatives that add creativity without compromising flavor.
If you’re feeling adventurous, try incorporating different flavors into your royal icing by adding extracts such as almond or lemon zest. This twist can elevate traditional recipes and surprise those who enjoy classic gingerbread.
Storing decorated Gingerbread Cookies properly can extend their shelf life significantly; consider using airtight containers lined with parchment paper between layers of cookies to maintain freshness without crushing delicate designs.
Lastly, consider hosting a decorating party where friends can join in on creating gingerbread masterpieces together! Provide various toppings like edible glitter, sprinkles, or dried fruits so everyone can express their creativity while enjoying a fun social activity during holiday gatherings.

FAQs
What is royal icing made from?
Royal icing consists primarily of egg whites (or meringue powder) mixed with powdered sugar and water until smooth and glossy. The key components create an ideal texture that hardens upon drying but remains easy to pipe into decorative designs on baked goods like Gingerbread Cookies with Royal Icing.
How do I prevent my gingerbread from spreading?
To prevent spreading during baking when making Gingerbread Cookies with Royal Icing, ensure that you chill your dough thoroughly before rolling it out and cutting shapes. Additionally, keeping an eye on oven temperature is crucial—baking at lower temperatures helps maintain shape integrity throughout cooking time.
Can I make my gingerbread dough ahead of time?
Yes! You can prepare Gingerbread Cookie dough ahead of time by wrapping it tightly in plastic wrap before refrigerating it for up to three days or freezing it for longer storage—up to three months! Just remember to allow thawing time before rolling out when ready to bake!
How long do decorated gingerbread cookies last?
Decorated Gingerbread Cookies typically last about one week if stored properly in an airtight container at room temperature away from direct sunlight or humidity sources—this way preserves both flavor integrity along with their beautifully applied decorations!
What should I do if my royal icing is too runny?
If you’ve found that your royal icing is too runny for proper application when decorating Gingerbread Cookies with Royal Icing, simply add more powdered sugar gradually until reaching desired consistency! A thicker texture allows better control during piping techniques while preventing drips!
How do I store un-decorated gingerbread cookies?
Store un-decorated Gingerbread Cookies by placing them inside airtight containers lined with wax paper between layers—this method prevents breakage while maintaining moisture levels longer than just leaving them exposed! Enjoy deliciously fresh-tasting treats anytime soon after baking!
Conclusion
Baking delicious Gingerbread Cookies with Royal Icing requires attention to detail but becomes enjoyable once you grasp essential techniques! Avoid common mistakes like improper ingredient measurements or neglecting chilling times for optimal results while learning handy tips such as experimenting with flavors will elevate standard recipes into memorable treats!
Moreover, prepare yourself by understanding proper storage methods—from both decorated versions down through un-decorated ones—ensuring freshness extends well beyond initial baking sessions! Embrace creativity within every step: spice combinations excite taste buds whereas unique decorations bring joy during festive celebrations!
By following these guidelines diligently alongside personal flair infused within creations brings forth delightful experiences shared amongst family members & friends alike—happy baking adventures await everyone willing enough!

